Imagine walking barefoot across a flawlessly smooth floor, every step a reflection of meticulous preparation and the perfect choice of floor screed. To achieve such perfection, you need to understand the fundamentals of different screed types and their specific applications. From traditional sand and cement mixes to modern self-levelling compounds, each option has unique benefits and requirements. But how do you decide which is right for your project? And what steps must you follow to guarantee a flawless finish? By exploring these critical factors, you’ll uncover the secrets to impeccable flooring.
Key Takeaways
– Conduct thorough subfloor inspections and moisture testing before screed application to ensure a stable and dry foundation.
– Choose the appropriate type of screed (traditional, self-levelling, or polymer-modified) based on project requirements and timelines.
– Follow manufacturer guidelines for mixing, application, and curing to achieve optimal strength and durability.
– Use proper tools and techniques for levelling and finishing to ensure a smooth, even surface.
– Maintain and protect the screed surface with regular cleaning, pH-neutral cleaners, and protective mats in high-traffic areas.
Understanding Floor Screed Basics
Floor screed serves as the foundational layer upon which many flooring systems are built, providing a smooth and level surface. When choosing a floor screed, you need to take into account both screed durability and moisture control to guarantee long-term performance and integrity.
Screed durability is critical. The material must withstand heavy loads and constant foot traffic without cracking or deteriorating. High-quality screeds incorporate additives that enhance their strength and flexibility, reducing the risk of failure over time.
You should also verify that the screed has been properly mixed and applied, as improper handling can compromise its durability.
Moisture control is another significant factor. Excess moisture in the screed can lead to issues like mould growth, structural damage, and flooring failure. To mitigate this, opt for screeds with moisture-resistant properties or those that include moisture barriers.
It’s important to measure the moisture content of the subfloor before screed application and use appropriate drying techniques to achieve ideal moisture levels.
Types of Floor Screed
When it comes to selecting the ideal type of screed for your flooring project, you’ll encounter several options, each suited to specific applications and conditions. Understanding these types is essential for ensuring best screed thickness and effective moisture control.
First, consider traditional sand and cement screeds. Though we’ll explore these deeper later, now they’re widely used for their affordability and ease of application.
Next, anhydrite screeds offer self-levelling properties and are ideal for larger areas due to their fast application and reduced screed thickness. However, their gypsum base means they require careful moisture control to prevent degradation.
Polymer-modified screeds incorporate resins to improve flexibility and bonding strength. These are perfect for areas with high foot traffic or where additional durability is needed.
Fast-drying screeds, such as calcium sulphate variants, are designed for projects with tight timelines. They offer rapid curing times but demand precise moisture control to avoid issues with flooring adhesion.
Lastly, there are bonded, unbonded, and floating screeds. Bonded screeds adhere directly to the substrate, providing strong support with minimal thickness.
Unbonded screeds sit atop a separating membrane, offering better moisture control, while floating screeds are laid over insulation, ideal for underfloor heating systems.
Each type provides unique benefits, making your choice significant for achieving perfect flooring.
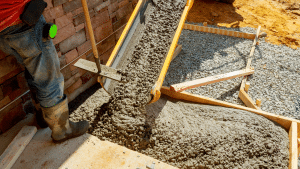
Sand and Cement Screeds
Among the various types of screeds, sand and cement screeds remain a staple in the industry due to their cost-effectiveness and straightforward application. These screeds typically consist of a 1:3 to 1:4.5 ratio of cement to sharp sand, providing a robust and versatile base for various flooring types.
When applying a sand and cement screed, achieving the correct screed thickness is essential. Ideally, you should aim for a minimum thickness of 40mm for bonded screeds and 65mm for unbonded or floating screeds. This guarantees structural integrity and prevents potential cracking or delamination.
Drying time is another critical factor. Typically, sand and cement screeds require a drying time of approximately one day per millimetre of screed thickness up to 50mm, and two days per millimetre beyond that. For instance, a 75mm screed would necessitate roughly 95 days to fully dry.
Accelerating this process with underfloor heating or dehumidifiers is possible, but it must be done cautiously to avoid compromising the screed’s integrity.
Implementing proper curing techniques, such as covering the screed with polythene sheeting, can also enhance strength and durability. By adhering to these guidelines, you’ll guarantee a high-quality, long-lasting flooring foundation.
Self-Levelling Screeds
Self-levelling screeds offer a modern and efficient solution for achieving perfectly flat and smooth flooring surfaces. Unlike traditional sand and cement screeds, self-levelling screeds flow easily and settle into a uniform layer, providing a high-quality finish with minimal effort. This method considerably reduces labour time and guarantees precision.
To leverage the self levelling benefits, you must follow specific application techniques:
- Surface Preparation: Verify the substrate is clean, dry, and free of contaminants. Any irregularities should be repaired to prevent them from affecting the screed’s performance.
- Mixing and Pouring: Use a mechanical mixer to achieve a consistent blend. Pour the mixture evenly across the surface, allowing it to flow naturally. A gauge rake can be used to help distribute the screed uniformly.
- Finishing and Curing: After pouring, use a spiked roller to remove air bubbles and guarantee an even finish. The screed typically sets quickly, but always adheres to the manufacturer’s recommended curing times for best results.
Utilising self-levelling screeds can transform your flooring installation, delivering a flawless, durable surface. By adhering to these precise application techniques, you’ll guarantee the highest standards of quality in your flooring projects.
Choosing the Right Screed
Choosing the right screed can make or break the success of your flooring project, so it’s crucial to understand your options and their specific applications.
First, consider the screed thickness required for your project. Traditional sand-cement screeds typically need a minimum thickness of 25-40mm for bonded applications and 50-70mm for unbonded or floating floors. Thinner screeds can compromise the structural integrity and durability of the final floor.
Next, evaluate the drying time, which greatly impacts project timelines. Traditional screeds have a drying time of around 1mm per day up to 40mm thickness and 0.5mm per day beyond that. If time constraints are a concern, opt for fast-drying screeds, which can reduce drying time to as little as 1 mm per hour.
Additionally, consider the specific application and load-bearing requirements. High-traffic areas may benefit from polymer-modified or fibre-reinforced screeds, which offer enhanced strength and reduced shrinkage.
For large-scale projects or uneven subfloors, self-levelling screeds provide a smooth, flat surface with minimal effort.
Preparing the Subfloor
Properly preparing the subfloor is a critical step to guarantee the longevity and performance of your flooring system. Start by conducting a thorough subfloor inspection to identify any cracks, uneven surfaces, or debris that could compromise the screed.
Use a straightedge to check for high or low spots, confirming a level foundation.
Next, perform moisture testing to determine if the subfloor contains excess moisture, as this can lead to screed failure. Utilise a hygrometer or calcium chloride test to accurately measure moisture levels. Aim for a moisture content that aligns with the manufacturer’s recommendations for your chosen screed type.
Follow these essential steps for ideal subfloor preparation:
- Subfloor Inspection: Carefully examine the subfloor for structural integrity, removing any loose particles and repairing visible defects.
- Moisture Testing: Conduct precise moisture testing to confirm the subfloor’s moisture levels are within acceptable limits.
- Surface Priming: Apply a suitable primer to enhance adhesion between the subfloor and the screed, ensuring a robust bond.
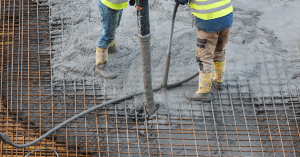
Installation Best Practices
Successful screed installation hinges on meticulous attention to detail and adherence to proven best practices.
First, guarantee the subfloor is appropriately primed and any impurities are removed. This step is essential for achieving ideal bonding. You’ll need specialised floor screed tools like a power screed, screed rails, and a straightedge to guarantee an even surface.
When it comes to screed application techniques, start by setting screed rails to the desired height. This will act as a guide for your screeding process.
Mix the screed to the right consistency—neither too wet nor too dry. Pour the screed mix onto the prepared subfloor, spreading it evenly with a shovel or trowel. Use the power screw to level the surface, making multiple passes to eliminate air pockets and guarantee uniformity.
After levelling, employ a straightedge to smooth out any imperfections. Pay close attention to corners and edges; they’re often neglected but vital for a flawless finish.
Finally, adhere to the recommended curing times and conditions. Rapid drying or excess moisture can compromise the integrity of the screed.
Maintenance and Care
Regularly maintaining your floor screed is vital for guaranteeing its longevity and superior performance. To maximise screed longevity, you’ll need to adopt a rigorous maintenance schedule and understand the nuances of surface protection.
Start by keeping the surface clean and free from debris. Dust and grit can cause micro-abrasions that degrade the screed over time.
Steps for Maintenance and Care:
- Routine Cleaning: Use a pH-neutral cleaner and avoid harsh chemicals. These can erode the screed surface, compromising its integrity.
- Periodic Inspections: Regularly check for cracks or uneven areas. Early detection and repair can prevent minor issues from becoming major problems.
- Surface Protection: Apply a high-quality sealant to safeguard against moisture ingress and wear. Surface protection is vital for areas subject to heavy foot traffic or mechanical loads.
Don’t overlook the importance of humidity control. Excess moisture can lead to screed degradation, reducing its lifespan. Use dehumidifiers if necessary to maintain ideal environmental conditions.
For high-traffic areas, consider adding protective mats or rugs to reduce direct wear. By following these steps, you guarantee your floor screed remains resilient and visually appealing for years to come.
Frequently Asked Questions
How Does Floor Screed Impact Indoor Air Quality?
You’ll find that screed composition directly impacts indoor air quality. Proper moisture control in the screed prevents mould growth and volatile organic compounds (VOCs) emissions, ensuring a healthier living environment. Choose high-quality materials for ideal results.
What Are the Environmental Benefits of Various Screed Types?
When considering screed sustainability, juxtapose traditional cement with eco-friendly materials. You’ll find that using recycled aggregates or low-carbon solutions drastically reduces environmental impact, making your flooring both durable and environmentally responsible. Choose wisely.
Can Floor Screeds Be Used With Underfloor Heating Systems?
Yes, you can use floor screeds with underfloor heating systems. Make certain you choose a screed with ideal thermal conductivity to maintain screed temperature, enhancing heating efficiency and guaranteeing even heat distribution across your flooring.
How Does Screed Thickness Affect Room Acoustics?
When it comes to screed thickness affecting room acoustics, every inch counts. Thicker screeds with higher density enhance sound absorption, reducing echo and noise transmission. Guarantee the screed density matches your acoustic requirements for peak performance.
Are There Any Aesthetic Options Available for Exposed Screeds?
Yes, exposed screeds offer design flexibility with various surface finishes like polished, stained, or textured. You can achieve a customised aesthetic while maintaining durability and performance, ensuring your flooring aligns with your design vision.
Conclusion
To hit the nail on the head with your flooring project, selecting the right floor screed is paramount. Assess your project needs, choose the suitable screed type, and meticulously prepare the subfloor. Follow mixing and application guidelines to the letter and allow sufficient curing. Regular maintenance and protective measures will keep your floor in excellent condition. By doing so, you’ll guarantee a flawless, durable finish that stands the test of time.