If built on a firm foundation, a shed will be at its best. Having a solid base ensures that your shed has a sturdy and level platform. Such a base also prevents any rotting from taking place as it has the ability to stop groundwater from sipping in and it won’t subside over time. That said the most permanent and strongest solution would be a concrete base.
What you need
- Cement, water and sand
- Pegs, strings and a Tape Measure
- Spirit Level and Set Square
- Rake and spade
- Earth rammer and finely-broken hardcore
- A 25mm thick Timber
- A mixing board or a cement mixer
- Tamp board
- Wheelbarrow
- Floor Bearers
Procedure:
The following steps can be followed when building the concrete shed base in a short period of time:
1. Choosing the Location
When choosing a location for the shed you have to think about what you’ll use the shed for. Ensure there are enough access and services for the use for which it’s intended. It’s advisable to leave a gap of one metre between the shed and the fences and walls that surround it for easy construction. Leave enough space to use for carrying out maintenance of the shed. If you need sunlight, avoid shady spots. Take the proximity of water and electricity if you’ll need them in the shed into account.
2. Carry out levelling of the site
Once the location is determined, ensure that the ground is clear and level. A flatter site makes the job much easier. A base that’s not levelled won’t be able to provide proper support thereby compromising the integrity of the shed over time. When humidity and temperatures change, the timbers are likely to flex. Further, the windows and doors may not shut in a proper way. Mark out the base area using the tape measure, string and pegs and use the set square to ensure the corners are 90 degrees. Get rid of all vegetation and turf inside the area marked. Then, remove the marking strings. However, the pegs should be left in place since they’ll be used later. Add the hardcore and then rake it level. Using the earth rammer compact the hardcore.
3. Construct a timber frame for containing the concrete
To contain the concrete as its setting, you need to construct a timber frame. The measurements of the inside must match your base’s dimensions. To be sure that the base of your shed is a perfect square, ensure the angles are equal by measuring them. The spirit level should also be used to check whether the frame is sitting level or not on the hardcore. If that’s not the case, make the necessary adjustments. At approximately every 600 millimetres inside the frame, secure the frame with additional pegs.
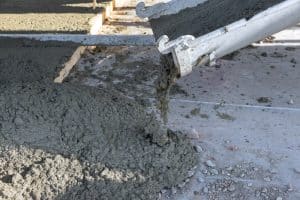
4. Mix and Pour the concrete into the frame
Here, you can use concrete that’s already mixed. Alternatively, you can mix cement, sand and water based on the instructions of the manufacturer. Normally, the cement-to-sand ratio is 1:5. Water should be added slowly until the consistency becomes workable. For mixing large quantities it’s advisable to hire a cement mixer. However, if you’re mixing small quantities at a time, ensure you use the same amount of water every time.
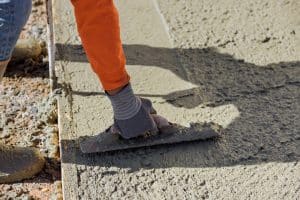
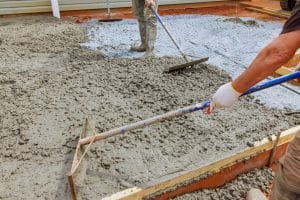
Then, begin to pour a layer of the concrete into your frame and ensure it gets to the corners and edges. Using the rammer compact the concrete after spreading it evenly. Continue to pour the layers of concrete until the frame is slightly overfilled. As a tamping beam, use the length of timber. Ensure that the surface is flat and even using a spirit level.
Conclusion
When you’ve followed the above steps to the letter and allowed the concrete to cure properly, you can go ahead and put up your shed on the base.